Halloween Elements Ornaments Clipart: A Practical Guide for Creative Workflows
When you work with digital design tools, craft cutters, or print-on-demand services, the quality and structure of your source files directly affect your output. Halloween Elements Ornaments Clipart is one of those versatile resources that fits into multiple stages of a project, whether you are planning a seasonal product line, preparing a one-off custom order, or building a library of reusable design assets. Understanding what this bundle contains, how the file formats function, and where it integrates into your existing workflow helps you avoid unnecessary rework and wasted materials.
Understanding the Components of the Bundle
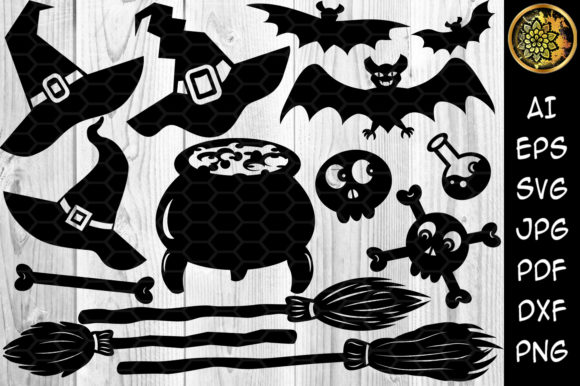
A typical Halloween Elements Ornaments clipart set, offered as an instant digital download, includes a ZIP archive containing multiple file formats: AI, EPS, DXF, PDF, SVG, JPEG, and PNG files. This variety is not accidental. Each format serves a specific role in a production pipeline. The SVG files provide scalable vector paths that work natively in programs like Cricut Design Space and Silhouette Studio. The DXF files serve the same purpose but are often preferred by users of older cutting machine software that imports this format more reliably. The AI and EPS files are useful if you plan to edit the vector shapes in Adobe Illustrator or CorelDRAW before exporting to a cutting platform. The PNG files with transparent backgrounds allow you to preview, present, or composite the designs in raster-based tools like Canva or Photoshop without having to open a vector editor.
The designs come in black by default. This color choice is intentional because it simplifies the cutting process: black outlines or fills are easily detected by cutting software for a clear cut line. Changing the fill color to any other hue takes seconds, either in your design application or directly within the cutting software's layer panel. This default also ensures that the files remain lightweight and easy to manipulate, especially when working with multiple ornament shapes on a single canvas.
Where Clipart Fits in a Broader Process
Creative projects, whether for personal use or client work, typically follow a cycle of planning, design, production, and review. Halloween Elements Ornaments Clipart can enter this cycle at several points. During the planning phase, you can open the included JPEG or PNG files to brainstorm layouts, test color palettes, or create mockups for a client presentation without committing to the final vector work. During the design phase, the SVG or DXF files let you scale, rotate, and combine ornament elements with text or other graphics to compose a finished file for cutting. During the production phase, the ready-to-cut paths minimize the time spent tracing or converting artwork, reducing the chance of jagged edges or incomplete cuts. And during the review phase, having a transparent PNG allows you to overlay the design on a photograph of a finished product, such as a mug or T-shirt, to verify placement before cutting vinyl or heat transfer material.
This flexibility makes the asset useful not only for hobbyist crafters but also for small business owners who produce seasonal inventory. If you sell on Etsy, Amazon Handmade, or at local craft fairs, having a consistent collection of ornament shapes ensures that your product line maintains a cohesive visual style without requiring you to redraw each design from scratch every season.
Integration with Software and Cutting Machines
The bundle is explicitly designed to work with cutting machines such as Cricut Explore, Cricut Maker, and Silhouette Cameo. These machines read vector path data from SVG or DXF files to control the blade. To integrate the clipart into your workflow, you need to first unzip the archive on your computer. Most modern operating systems handle ZIP files natively, but if you are using a tablet or smartphone, you may need a file management app that supports extraction.
When importing the SVG file into Cricut Design Space, you will notice that the individual ornament elements are grouped. Ungroup them to access each shape independently. This allows you to weld, slice, or attach them to other elements as needed. For Silhouette Studio, the DXF format tends to retain layer separation reliably, but you can also use the SVG if you have the Designer Edition upgrade. If you plan to edit the vectors extensively, open the EPS or AI file first in a dedicated vector editor, make your changes, and then export a fresh SVG or DXF for cutting. This round-trip workflow preserves the original paths and prevents degradation of the design quality caused by repeated import and export cycles.
Practical Implementation Tips
One of the most common mistakes when using digital clipart with cutting machines is not checking the scale of the design relative to the intended item. Open the SVG file and measure the width of the ornament shape. If you are creating a design for a standard 11-ounce coffee mug, the decoration area is roughly 8 inches wide by 3.5 inches tall. Scale the ornament to fit comfortably within that space, leaving at least a quarter-inch margin from the mug's rim and handle. For a T-shirt, the design area is usually centered on the chest, about 4 to 5 inches wide for an adult. Resize the ornament accordingly before cutting.
Because the designs come in black, you have a clear visual cue for layering. If you are using multiple colors of vinyl, you can duplicate the ornament in your design file, assign each duplicate a different fill color, and then use the offset or inset path tools to create a shadow layer. This technique adds depth to the final product and makes the ornament look more dimensional. The included PDF file often contains a visual reference sheet, which is helpful when you need to quickly identify which ornament you want to use without opening each SVG file individually.
Another practical consideration is material preparation. Vinyl and heat transfer materials come in rolls or sheets. Before cutting, verify the material thickness settings in your machine's software. Most clipart designed for ornaments has relatively clean lines, but if a design contains delicate internal cutouts (such as small stars inside a circle), you may need to adjust the blade pressure or use a mat with stronger tack to prevent the material from shifting during the cut.
Workflow Examples for Different Use Cases
Small business product line. You are preparing a Halloween-themed collection of coffee mugs, tote bags, and koozies. Using the Halloween Elements Ornaments Clipart, you select five ornament shapes that share a similar line weight. In your vector editor, you create a layout file that places each ornament on a separate canvas sized to your blank product. You export each canvas as a separate SVG file, then import each one into Cricut Design Space. You assign a different metallic or holographic vinyl color to each ornament. After cutting and weeding, you apply the decals to your blanks. The consistency of the vector paths ensures that all five products share a uniform visual style, which strengthens your brand.
Personalized party favors. You are hosting a Halloween gathering and want to give guests custom stickers or favor tags. You open the PNG file with transparent background and insert it into a document in Canva or Microsoft Word. You add guest names or a short greeting below each ornament. Print the page on sticker paper or card stock, then cut with scissors or a paper trimmer. Because the PNG has a transparent background, the ornament blends directly with the paper color without any white box around it. This method takes less than fifteen minutes and produces professional-looking results without any vector editing or machine setup.
Classroom or educational projects. A teacher assembling a Halloween lesson plan can use the JPEG files as elements in a worksheet. Insert the ornament images alongside text, or ask students to color them in as part of an art activity. The JPEG format ensures that the images open in any standard viewer or editor, and the consistent resolution keeps the lines sharp when printed at letter size.
Organizing Your Digital Assets for Efficiency
Once you download the ZIP archive, take a few minutes to organize the files before you start working. Create a folder on your computer with a clear name, such as "Halloween Ornaments 2025." Inside that folder, create subfolders for each format: SVG, DXF, PNG, PDF, AI, EPS, and JPEG. Move the files accordingly. This structure makes it easy to locate the right format later, especially when you are in the middle of a production run and need to quickly find the SVG for a specific ornament. You can also add a shortcut to this folder in your design software's file library, so the assets are accessible directly from the open dialog.
If you use a cloud storage service like Google Drive or Dropbox, sync this folder to the cloud. That way, you can access the files from different computers or share them with collaborators without re-downloading the original zip file each time. Cloud storage also serves as a backup in case your local drive fails.
Ensuring Consistency and Quality Control
When using clipart across multiple products, consistency in line thickness, scale, and color becomes important. Establish a simple quality control routine. After you import an SVG file into your cutting software, zoom in to 200% or 300% and inspect the paths for any stray nodes, overlapping lines, or unclosed shapes. The vector files in a well-made clipart set should be clean, but this check takes only a few seconds and can save you from wasting vinyl or heat transfer material. If you find an issue, return to the original AI or EPS file to repair the path, then re-export the SVG. Once you are satisfied, save that corrected version to your working folder and archive the original for reference.
For repeat use, such as producing the same design on multiple products every season, create a template file in your vector editor or cutting software. Place the ornament in the desired position relative to the product outline (mug, T-shirt, tote bag, etc.). Save this template with the ornament already scaled and positioned. Next year, you only need to open the template, confirm that the paths still meet your quality standards, and cut. This practice saves significant setup time and ensures that your products have consistent placement across production runs.
Long-Term Use and Reusability
Because the files are digital, they do not degrade over time. You can reuse the Halloween Elements Ornaments Clipart for multiple seasons, as long as you store the files properly. If you update your cutting machine or switch to a different design software, the SVG and DXF formats are widely supported and likely to remain compatible for years. The AI and EPS files provide a fallback in case an application no longer imports SVG cleanly, because you can always open the vector file in a dedicated editor and re-export to a modern format.
Consider using the same clipart as a starting point for derivative designs. You can combine two or three ornament shapes into a new composite motif, add text, rotate elements, or scale them to create a pattern fill. This approach extends the value of the original purchase and gives your work a distinct look that does not rely solely on the original arrangement.
Final Observations on Integration
Digital clipart assets like the Halloween Elements Ornaments Clipart bundle become most valuable when you treat them as part of a reproducible system rather than as one-off pieces. By understanding the strengths of each file format, organizing your assets before a project begins, and implementing a simple quality check before production, you reduce the friction between idea and finished product. Whether you are producing a single custom mug for a friend or a full product line for a holiday pop-up shop, the preparation you invest upfront pays off in faster turnaround times and fewer material mistakes.
The Halloween Elements Ornaments Clipart set, with its multiple formats and pre-optimized black color, is designed to fit seamlessly into that system. Taking the time to learn how each format behaves in your specific software and hardware combination will make every future seasonal project smoother, from planning to production to final delivery.