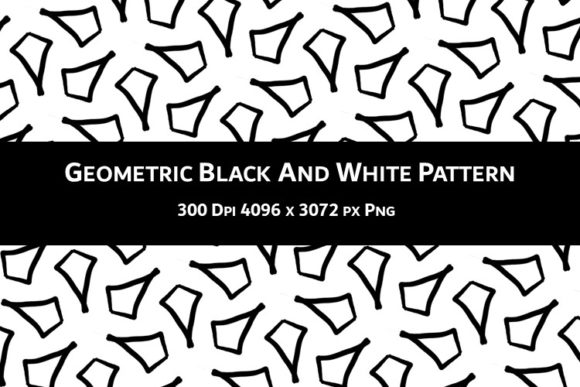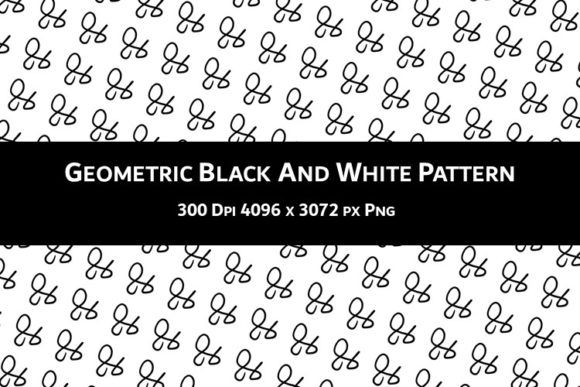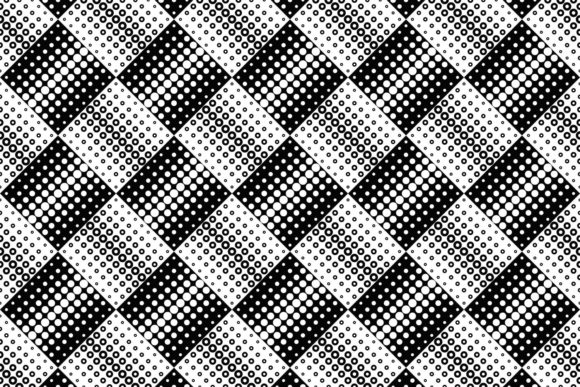
Geometric Black and White Pattern V.33: A Versatile Design for Your Creative Projects
You have probably seen the striking appeal of geometric patterns in black and white. They bring order, contrast, and a timeless sophistication to almost any visual project. Geometric Black and White Pattern V.33 is one such design — a single high-resolution PNG file that packs a lot of creative potential. Whether you are a hobbyist scrapbooker, a small business owner designing book covers for KDP, or a freelancer putting together party invitations, this pattern offers a clean foundation. But before you rush to use it, let’s talk about what this pattern really is, what it is not, and how to avoid common missteps that could undermine your results.
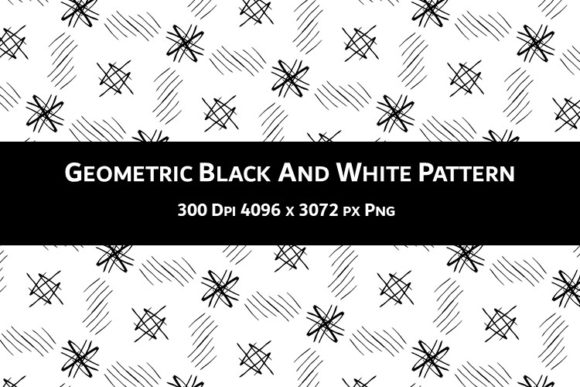
The pattern comes as one PNG file at 300 DPI, with dimensions of 4096 x 3072 pixels and a white background. That means you get a large, crisp image suitable for print or digital use. However — and this is important — the pattern is not seamless. That single detail changes how you should approach it, and overlooking it is one of the most common mistakes people make.
Mistake #1: Treating It Like a Seamless Tile
The biggest misunderstanding occurs when creators assume that because it looks like a repeating pattern, it tiles seamlessly. Many design projects — wallpaper, wrapping paper, scrapbook backgrounds, planner pages — benefit from seamless repeats. When you try to tile a non-seamless pattern like V.33, you will see visible seams, mismatched lines, and jarring breaks. This ruins the professional finish you want.
What to do instead: Use the pattern as a single, contained element or frame. For a KDP book cover, you can place the pattern across the full front cover or back cover as a standalone background, but avoid extending it across the spine and back in a way that demands a seamless join. For scrapbooking, cut it out as a large panel or use it as a base layer that you cover partially with other elements. If you absolutely need a seamless version, you can attempt to edit the pattern in software like Photoshop or GIMP using clone tools and offset filters, but that requires some skill and time. It is often simpler to design your layout around the pattern being a single piece rather than forcing a repeat.
Mistake #2: Ignoring the White Background
The file includes a white background, not transparency. This is a deliberate design choice — it gives the pattern a clean, crisp edge and makes it easy to place on white or light backgrounds. But if you plan to overlay the pattern on colored or textured backgrounds, the white rectangle will show. That can look like a cut-out box around your design, breaking the illusion of the pattern floating naturally.
How to handle this: In your design software, you can remove the white background by using a selection tool (magic wand or color range) and deleting it, then saving as a PNG with transparency. Alternatively, incorporate the white background intentionally — for instance, use the whole image as a card front where the white acts as a border. Many paper crafters find that the white background works perfectly for invitations on white cardstock or for planner pages where you want a clean white margin. Know your medium before you assume transparency.
Mistake #3: Scaling Without Checking Resolution
At 4096 x 3072 pixels and 300 DPI, the pattern is large enough for many print uses. But some people try to scale it down significantly for small items like gift tags or up for large posters, and they do not check the resulting quality. Scaling up too much will pixelate the geometric lines; scaling down extremely might lose fine detail. Also, if you resize the pattern non-proportionally (stretching it), the geometry distorts, which defeats the purpose of a sharp, balanced design.
Practical advice: Always work in a copy of the original file. Use software that maintains aspect ratio when scaling. For print projects, keep the DPI unchanged — if you need a smaller version, downsample the image properly (not just resize in a word processor). For digital use, you can reduce resolution to 72 DPI for web, but keep the pixel dimensions reasonable so the pattern remains crisp. A good rule: never scale the image beyond 120% of its original size in a layout unless you are willing to accept some softness.
Mistake #4: Overlooking the Non-Seamless Limitation for Paper Crafts
Scrapbookers and card makers love patterns that they can cut and paste repeatedly across a page. Because V.33 is not seamless, cutting it into strips or multiple blocks and placing them side by side will show gaps or misaligned lines. The pattern is designed as one cohesive artwork, not a modular tile.
Better approach: Use the pattern as a single large feature. For a scrapbook page, you might print it as a full 12x12 inch background (after adjusting dimensions) and then layer photos and embellishments on top. For a card, print at the card size and fold the pattern across the whole front. If you need smaller pieces, cut them from one large print, but avoid trying to piece them together edge-to-edge. Alternatively, use the pattern as a digital background in your software and layer other digital elements over it — no cutting or aligning needed.
Mistake #5: Not Checking the File Format and DPI Before Purchase or Download
Some creators grab the file without confirming it meets their specific project needs. For instance, if you need a pattern for a large-format print like a banner, the 4096 x 3072 pixel size at 300 DPI translates to about 13.65 x 10.24 inches at full resolution. That might be smaller than you expect. Also, some users mistake the 300 DPI for something that automatically makes the pattern print at any size — but DPI only affects print dimensions when combined with pixel count. A 300 DPI PNG is excellent for standard print projects, but if you need a floor-to-ceiling mural, you will need to upscale, which may reduce quality.
What to check before you commit: Know your final output size. For a KDP paperback cover, the typical trim size might be 6x9 inches. At 300 DPI, your pattern easily covers that with room to spare. For a square scrapbook page (12x12 inches), you will be right at the edge — 12 inches at 300 DPI needs 3600 pixels; your pattern gives 4096 in one dimension and 3072 in the other, so you may need to rotate or crop. Do the math early. Also, confirm that the file is a PNG (lossless, good for graphics) and not a JPEG (which might have compression artifacts). The product description says 1 PNG file, which is ideal, but always verify.
Mistake #6: Using the Pattern Without Considering Its Style Context
Geometric black and white patterns can feel modern, art deco, minimalist, or even retro depending on the specific shapes. V.33 has a particular arrangement — crisp lines, repeating geometric motifs. It may not suit every project. A vintage wedding invitation might look out of place with a stark modern geometric background. A children’s birthday party invitation might feel too severe. This pattern shines in contemporary, professional, and uncluttered designs.
How to choose wisely: Evaluate your project’s tone. For business planners, tech-themed book covers, or minimalist greeting cards, this pattern is a strong match. For something softer or more organic, consider pairing it with natural textures or muted colors (by adding an overlay in your software). You can also use the pattern as an accent — for example, as a border strip or a small decorative element on an invitation — to get the geometric feel without overwhelming the design. Never force a pattern just because it looks good on its own; always test it in context.
Mistake #7: Forgetting to Test Print or Preview
Even after you have adjusted size, removed the white background, and placed the pattern into your layout, what you see on screen may differ from the final print. Screens are backlit and often show higher contrast than paper. The black lines could appear thinner or thicker when printed, and the white may blend differently with your chosen paper stock.
Simple fix: Always do a test print on the same paper you plan to use for the final product. Print a small section or a scaled-down version to check contrast and line sharpness. If you are selling on KDP, request a proof copy before publishing. Many small errors — like a thin white line appearing where the background meets the pattern edge — only become obvious in print. A test print saves you from wasting materials or disappointing customers.
Putting It All Together: Realistic Examples
Imagine you are designing a minimalist journal cover for KDP. You want the geometric pattern to cover the entire front. Because it is not seamless, you would not use it across the spine and back in one continuous image unless you plan the layout so the spine falls in an area without critical pattern elements. A better move: use the pattern only on the front cover, keeping the back cover solid black or white with a simple text. This avoids alignment issues and still looks cohesive.
For a scrapbook layout, you might print the pattern at 8x10 inches and mat it on a darker cardstock. Then layer a photo and embellishments on top. The pattern becomes a strong background that does not fight for attention because its black-and-white nature stays neutral. For party invitations, you could remove the white background in Photoshop, place the pattern as a watermark behind the text, and print on colored paper. The geometric lines add depth without requiring a full background.
Gift wrapping? The pattern can be printed on a single large sheet of paper and used to wrap a small gift box, with the edges tucked neatly so no cutting through pattern lines is needed. The non-seamless issue does not matter if you wrap a single face of the box with the pattern as a decorative panel, not a full wrap.
In each case, understanding the pattern’s strengths and limitations lets you design around them rather than fighting them. Geometric Black and White Pattern V.33 is a tool — like a beautiful piece of fabric with a unique weave. You do not cut it randomly; you work with its grain. Do that, and the results will look intentional and polished.
Your imagination truly is the only limit, as long as you respect the file specs. Use the 300 DPI advantage for print, the large canvas for flexible cropping, and the crisp geometric lines for modern projects. Avoid the seven mistakes above, and you will get the most out of this pattern without frustration. Whether you are a beginner experimenting with paper crafts or a seasoned entrepreneur launching a new KDP series, take a few minutes to plan your layout, test your print, and adjust for the white background and non-seamless nature. The effort pays off in a finished product that speaks of quality and care.